Friday, February 16, 2018

TGIF! And A Finish

I love Fridays.  I only work half a day for one thing.  Another reason is Friday Night Sewing at my aunt's house.  The only time that's not a joy is if the weather is really cold, and I have to come home via a cold walk to the street to get into my cold car.  Which eventually warms up, but in the meantime -- brrrr!


We usually all wear red on Fridays in honor of The Troops.  We have family who have served or are serving in the military, and we thank them for their service.


This week in keeping with the weekday themes people seem to be doing of matching a word to the first letter of the day, I'm posting a Friday Finish. 


I'm following up on my resolution and I hope it can be fun!


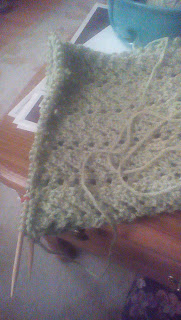
I'm talking about my green lace sweater. I feel like I've knit the equivalent of two sweaters due to my inability to follow the very simple lace pattern... LOL!  When I finally set stitch markers every two lace patterns I thought I'd solved it, but even that didn't help.  I'm hopeless.


It's finally complete.  Sleeve progress was just as slow as the rest of it.  I knit the first sleeve twice, and had to completely rip it back at the point where it was about 4 inches long.  Each inch is five rows, each column of the lace pattern is seven stitches and there are 10 of them.  That's 1,400 stitches.  Then I had to pull out two rows, un-knitting each stitch so I didn't lose the yarn overs.  Oh don't tell me I don't know how to have fun!


Once the first sleeve was done, the second had to match.  Duh.  I tried counting the patterns and thought I had it just exactly right, then I knit the cuff and bound off, only to find that the first sleeve was about 3/4 of an inch longer.


Grrrr...

This is the original sleeve cuff design.  I changed it, see below.

I have no idea why the Inspector hadn't told me that while it was happening.

She kept her advice to herself...

Once it was done, and I had tried it on, I decided that the garter stitch cuffs were too bulky and made me look like the Michelin Man.  That was 2 inches of cuff, so approximately 700 stitches.  Each.


Off the came, and I knitted a small ribbed cuff instead.  Now it just needs a good soak and blocking. 


Finished is better than perfect, right?
I skipped the buttonholes because I want to use one of those scarf fasteners instead of buttons.  I hope the sleeves are not too bulky when I actually wear it.  They are not going to fit inside of most of my coats, but it will make a nice spring/fall jacket alternative.


Too bad it's not red...


If you're interested in the pattern, it's February Lady Sweater and it's free on ravelry.com.


And thanks to a few blogs I read including Patchwork Times by Judy Laquidara in Texas, I have some 'replacement' yarn coming via UPS some time next week.  She would have to remind me that Eat-Sleep-Knit dot com was having a sale.  The rest is history.


That's my story and I'm sticking to it.


Knit on...

Thursday, February 15, 2018

Quilt Guild This Week - The Topic Was Rulers

At our local Quilt Guild this week, one of our members gave a demonstration of projects she made with the specialty rulers and templates that she had in her collection.  You know, the drawer or box or pile everyone has of those notions that seemed so vital when we bought them... we all have them.


Linda did a super job of showing us how (and in some cases how not) to use more than a dozen rulers and templates for actual projects.  I lost count as to how many there were in total.  Some she said she loved, some not so much, but I have to say she did a beautiful job on the projects!

I own this ruler and I do use it.
One we probably all have is a Flying Goose (or Geese) template/ruler.  I have at least two of them.  The one I have does only two sizes.  Linda had that one plus another that does maybe 8 sizes. 


There were a couple of things she showed that I would never have imagined, like a quilt block made from a 2.5 inch strip using the tool you use to trim your binding ends.  The arrangement of the blocks makes it look like ribbons running down the quilt.
Image may not be the exact
one she used but this is
the right shape.
That made me think about my own personal pile of rulers and templates.  I hate to admit it but it's bigger than a bread box!

I've got a whole bunch of the Marti Michel templates that at first I thought were kind of an affectation... I avoided templates for years and years.  Then I saw Marti at Sewing Weekend giving a lecture about how quilting has evolved over the years.  She demonstrated some of the ways the templates actually save time in sewing by giving you accurate cuts.  Gotta love that. 
 
Linda showed us a runner she made
using a half hexie template.
 

Some of the templates I have get lots of use, and some of them, well, not so much.  I have a big hexagon that makes either full or half hexes.  I really need to get that one out for my next 'new' project.  I want to make one of the runners she showed us. 

But I do like the log cabin rulers.


Yes, there is a ruler for log cabin blocks, and yes, it does save time when you use it!

One of the things that always annoyed me about log cabin blocks was squaring them up.  And if you don't square every round, pretty soon your blocks get wavy on the outside edges and pretty soon you can have a bowl instead.
 
So if you do as Marti demonstrates, and cut all the pieces ahead of time, you can cut exactly the right sizes, match the ends, assembly line sew, and get accurate, flat blocks every time.  AND if you do as Marti recommended during her lecture and cut your strips lengthwise instead of across the grain, they'll be even more stable.

You know the problem when your borders expand as you sew them on?  The way the quilt police always teach has you measure the length of your quilt and cut the borders that size, then fit the quilt top to the borders.  When you're done, they are the same size and your quilt is square.

These rulers are on the same principle.  Then there's two on each ruler that, if you cut one side from the wider side and one from the narrower, you get a fat and skinny LC that makes your quilt block look curved while you sewed only straight lines.  I need to get one of those going.

Oh oh... two UFO finishes just lined up!*

 
One of the better things I've done with my rulers and templates is to put grippers on the backs so they don't slip when you use them with a rotary cutter.  I like these little TrueGrips.  I also like the film you can use on the back of the entire ruler.
I store my templates in a drawer along with my smaller rulers.  My big rulers go on the table or on the wall in one of these wooden slatted holders.  The medium rulers go on the wall to the left of my sewing machine and the big or long rulers go on the table at my cutting station.

I have been drooling over this shelf unit.  I'll have to hint when my birthday gets closer.

 
Linda summed up her presentation by saying the job is easier with the right tools and I agree.  And you cannot have too many tools.  I hear women say all the time 'I don't need another ruler'.  But you never, ever, ever hear a man say 'I don't need another screwdriver (drill, hammer, fishing lure, socket wrench, etc)'.  Trust me on this.


Sew on...
 
 *New Years resolution, finish one UFO for every new project started.

Tuesday, February 13, 2018

Bed Runner Project

My helper, the Inspector...
Project number two on the UFO list is a bed runner for my master bedroom.  I started it several years ago and it got set aside.  Mostly it's pieces of things left over from other red and white projects, but there are some intentionally created blocks that didn't tell me what they wanted to be, just that they needed to exist.


One section is some of the nine-patches that I love to make with little left over chunks of fabric cut into two inch squares.  You can do so much with nine patch units.  And they're restful and relaxing to sew.


The middle section is appliqued hearts.  They are very small hearts, so I didn't sew them down, I just stuck them on with Wonder Under and quilted them on the background.  They're alternated with four patch blocks made with 2.5 inch strips.  The bottom row is pinwheels and squares.


The runner had to be wide enough to hang over the sides of the mattress, so I filled it out with pieces of a pretty red on red print.  The back is a yard of Kaffe Fasset print that I got as a part of the drawing I won at Quiltagious in Mukwonago.

And I QUILTED it!!  Under the theory of 'finished is better than perfect', I did some echo quilting inside the seam lines of the four- and nine-patches, I X-d the solid blocks, and quilted around the outside of the hearts.  Then, getting comfortable with the sewing machine and a little wild and crazy, I put figure 8s in one of the borders.

I sewed on the binding, and now just have to stitch down the last four inches of binding to be DONE!

Front

And back.
The runner ended up at 72 inches by 26 inches.  Just right to keep your feet warm on a cold Wisconsin winter night.

Two down... and I'm not saying how many to go.  LOL!

Sew on...