Here's what happens to me: I think about something I want to write about, something that happened, something that I want to save to remember, and then I think, oh gosh, I should have taken a picture of that while I was doing it.
I have a camera or two at home and one in my phone. I usually have the phone here:
 |
| Bottom drawer of my desk, phone in the pocket. Or next to the back door... to grab on my way out. |
Tonight I was thinking about my craft fair stuff and about how my selling point for the doll clothes is that they're garment quality fabric and well made, machine washable and they will stand up to a lot of play. How do you illustrate that?
When you buy clothes, do you look inside to see how well they are made? I do. After being burned by garments whose hems get wavy upon washing, or where the seams are so tiny they pull out, I always look inside. I have a lovely jacket from Coldwater Creek that pulled apart in a back seam, and I am struggling to figure out how to fix that, but that's another blog. (If I remember to shoot pics while I'm doing it!!)
When making small things, you use a correspondingly small seam allowance. Instead of sewing and trimming you just cut smaller. A doll's armhole is only about 2-3 inches long, and the curve is quite sharp. So when I sew dresses, instead of using facings I will cut double front and back bodices, then sew each one separately only at the shoulder seams, leaving the side seams open. I put them right sides together and sew up the center back, around the neck and down the other side. Then I sew both armholes. Then I CAREFULLY clip into the curves up to but not through the stitching.
Since I didn't take any pictures of this process, I made some VERY crude drawings... I'm sure you can find some much better pictures on YouTube somewhere if you don't understand what I've got here...
 |
| This actually says "1/4 inch seam allowance, flat bodices right sides together. and it's #1 in the circle. |
 |
| The paper says Wrong side, honestly, I can spell. |
 |
| Sew the top to the skirt by putting the top inside the skirt right sides together. Sew the skirt to the bodice but not to the lining. Ugh, my scanner!! |
After pressing and turning right side out again, I put the top, right side of bodice against the right side of the skirt. The skirt will be inside out at this point. If it's a gathered skirt, I pin the heck out if it to keep it together and to keep the gathers smooth. I also make sure the lining is pulled away from where I'm sewing so it doesn't get caught. These pieces are SMALL so go slowly and carefully!
 |
| Insert the waistline seam into the bodice...that last word is topstitch. |
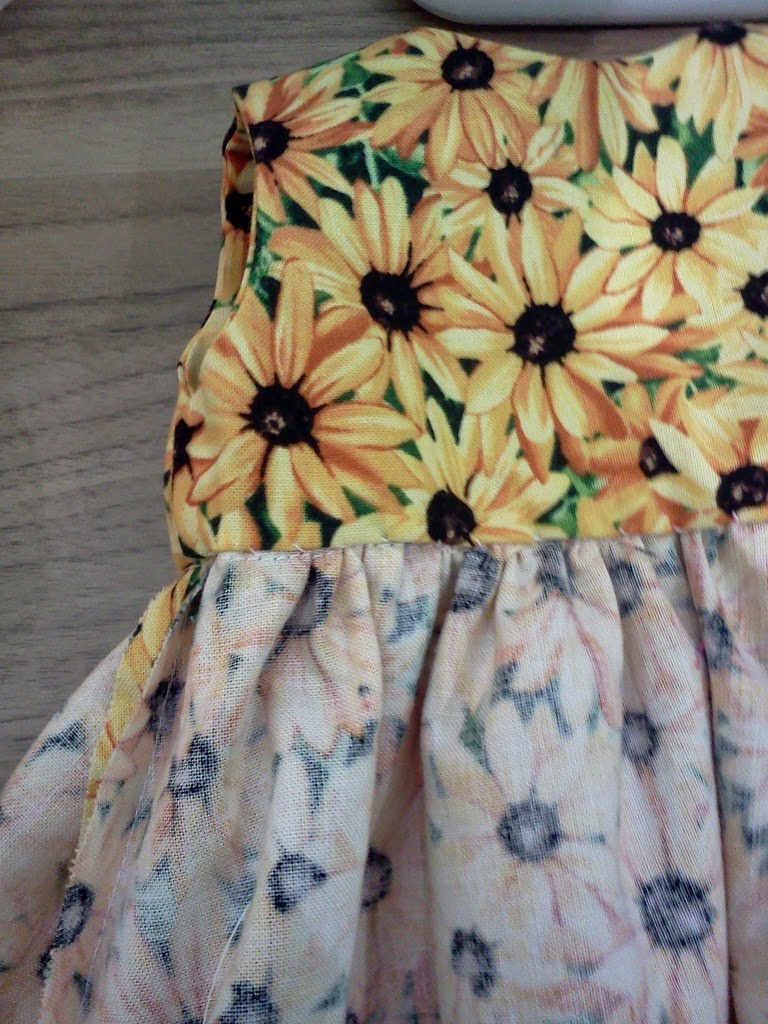
The last step is to tuck down the bodice lining, fold it over and topstitch it to the skirt. Depending upon how much is showing between the lower armhole and the top of the skirt, I may turn under a little more than a quarter inch for this seam. And because I hate messy, I like this method that covers up all the raw edges.
Here it is in real life:
 |
| This one I stitched down by hand because I didn't have the right color yellow thread... but it looks good that way too! |
 |
| You can sew by machine on the wrong side or the right side, but it's more accurate from the wrong side. The right side looks fine! |
On this little top, I did one layer. I stitched on the ruffle, but the raw edges show on the inside... not that most of the little girls will notice but I noticed. Next time i do this I will use my serger... and see that thread?
This is where it ended up:
 |
| That's the leg of my jeans. |
I hope you enjoyed my pathetic efforts at a tutorial! Maybe next time I will remember my camera.
Sew on...


